Wood Flooring
Knowledge Base
Knowledge Base
 Please refer to the follow guides to help you with your wood flooring installation. As always, be sure to make sure you prepare properly, understand the characteristics of natural wood and floor specific installation details.
Solid Flooring Installation
Engineered Flooring Installation
Radiant Heat Floor Installation
For questions: 1-855-STN-WOOD (786-9663)
Please follow these installation procedures exactly to ensure the successful installation of your new hardwood floor. These procedures are written with an experienced installer audience in mind, so if you require more information on the basic procedures of installation, we encourage you to contact the NWFA for more information at www.nwfa.org or by phone at 1-800-422-4556.
Please note that hardwood flooring mills can provide their own instructional materials for their products,and that these guides should be followed exactly and take precedence over this installation guide.
Before Installation
Wood Inspection
Inspect all materials products prior to installation. DO NOT install defective materials. Wood is a natural product with natural color variations, grain variations, and tone variations. Though products do undergo a rigorous inspection process before leaving the plant, it is still necessary to inspect the materials in order to ensure their quality. Installation of defective materials could result in voiding your warranty.
Sequence of Installation
In order to ensure that no damage is done to the wood over the course of construction, particularly in the case of homes under construction and renovation, wood flooring should always be installed after all other installations are finished. Additionally, foot traffic should be kept to a minimum after the installation of the floor is complete. If a protective cover is placed over the floor at this time, make sure that the entire floor is covered as many woods are sensitive to light and will undergo color change, creating a “spotting” affect.
Sub-Floor Considerations
Wood sub-floors must be secured with screws or nailed. Nails need to be ring shank and screws must be counter sunk. In the event that the wood sub-floor is less than 3/4’’ thick, add a single cross layer with a minimum thickness of 5/16’’ for a total of 1’’ inch of thickness in order to combat possible squeaking after installation. There must be no oil, existing adhesives, wax, grease, urethane, dirt, varnish, paint, etc. on the wood subfloor. Particleboard is not a possible sub-flooring option for staple or nail down installation, but it can be sufficient for a glue down installation. Subfloors can not possess a moisture content of over 12%. Additionally, the hardwood flooring’s moisture content and that of the subfloor can not have a difference of more than 4%.
Grades of House/Building
For the different grades of a house, there are different restrictions for which types of hardwood can be installed. For above-grade and on-grade installation, engineered hardwood, solid hardwood, and a floating floor are all acceptable. However, at below-grade, only floating floors and engineered hardwood are options. Should the ground around a building be 3 or more inches above the floor of that level, that level is considered below-grade, and thus ineligible for solid hardwood.
Acclimation
Acclimating Hardwood is often an essential task for ensuring the wood doesn’t undergo any unforeseen dimensional shifts after or even during the installation. While acclimating, make sure not to store hardwood in a location where the temperature and humidity is not that of the living space within the house, such as a garage or exterior patio. Preferably, the house should have all of the heating, ventilation, and air conditioning systems running for at least five days before the hardwood arrives for acclimation.
Checking Boards’ Moisture Content
The relationship between the moisture content of the hardwood boards and that of the subflooring determines whether or not the wood is acceptable for installation. In order to ascertain these moisture values, check various boards’ moisture content, approximately 4 boards for every 100 square feet. If the wood is solid and wider than 3’’, then there should be no more than a 2% difference between moisture content of the wood after it has acclimated and the subflooring. With hardwood that is narrower than 3’’, the difference between the moisture content of the hardwood and the subfloor should be no more than 4%. As a general rule, wood floor maintains dimensional stability best within a temperature range of 60-80° Fahrenheit and a humidity range of 35-65%. The two exceptions to this rule apply to imported and exotic wood species, as they may react differently to these circumstances, and extreme geographical circumstances.
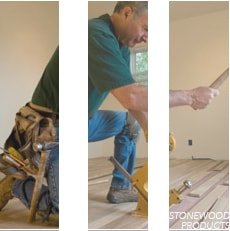
Installation
When preparing to install solid hardwood flooring, be sure that you do not install over an area with radiant heat. 15 lbs. asphalt felt must be laid to install, and a moisture barrier of 6 mil polyethylene film may also be necessary. This protects against moisture rising up from below and also helps prevent squeaking. Install the vapor barrier parallel to the direction of the flooring. Make sure that the vapor barrier has a 3’’ overhang around the perimeter, and that it overlaps each previous run by at least 6’’.
Door frames in the flooring area can be cut approximately 1/16 of an inch higher than the hardwood being installed to increase the ease of installation and avoid complex cuts.Take boards out of several boxes in order to ensure good tonal variety and mixture in the floor. Lay your flooring at a 90° angle to the floor joists whenever possible. Using an external wall as a reference, snap a working line parallel to the reference wall, allowing for the requisite expansion space.
Put down a row of planks that runs the along the length of the working line. Make sure the tongues are always facing out as using the tapping block on the plank’s groove could damage the board. Blind nail and top nail the first row, while being sure to use only the appropriate fasteners.
Research the specie of wood you’re installing to determine whether or not it will require pre-drilling in order to nail it down. The later rows of boards should be blind nailed whenever possible. Also, attempt to nail the boards into joists whenever possible. Nails should be 1-2’’ from the ends of the boards and every 4-6’’ along the edge of the boards, going in at a 45° angle. Make sure to stagger your boards such that no two end joints are within three rows or 6’’ of each other.
Once installation is complete, use appropriate trim moldings and wall moldings along walls and doorways to cover edges and conceal gaps resulting from any irregularities in perimeter dimensions. Use a flooring filler to fill in any wide seems along joints that blends with the tone of the wood. Clean the floor with a recommended hardwood flooring cleaner.
Refer to Solid Floor Pre-Installation Guidelines
Engineered Flooring Installation
Engineered flooring is very versatile, able to be installed below-grade as well as directly onto concrete or sub-flooring. There are three types of engineered floors we will address here: Nail-down floors, floating floors, and glue-down floors. Whatever method you choose to install your flooring, make sure to follow all specifications and guidelines set by your installer, your hardwood supplier, and, in the case of glue-down flooring, the adhesive manufacturer. Engineered flooring can be installed over radiant heat under the proper conditions, but the heat must be turned off during installation.
Nail-Down Engineered Flooring
The first step to installing either a nail-down engineered floor or a free-floating engineered floor is to install a 6-mil polyethylene layer over the sub-floor. This protects against moisture rising up from below and also helps prevent squeaking. Install the vapor barrier parallel to the direction of the flooring. Make sure that the vapor barrier has a 3’’ overhang around the perimeter, and that it overlaps each previous run by at least 6’’.
Take boards out of several boxes in order to ensure good tonal variety and mixture in the floor. Lay your flooring at a 90° angle to the floor joists whenever possible. Using an external wall as a reference, snap a working line parallel to the reference wall, allowing for the requisite expansion space.
Put down a row of planks that runs the along the length of the working line. Make sure the tongues are always facing out as using the tapping block on the plank’s groove could damage the board. Blind nail and top nail the first row, while being sure to use only the appropriate fasteners. Research the specie of wood you’re installing to determine whether or not it will require pre-drilling in order to nail it down. The latter rows should be blind nailed whenever possible. Attempt to nail the boards into joists whenever possible. Nails should be 1-2’’ from the ends of the boards and every 4-6’’ along the edge of the boards, going in at a 45° angle.
Make sure to stagger your boards such that no two end joints are within three rows or 6’’ of each other. Once installation is complete, use appropriate trim moldings and wall moldings along walls and doorways to cover edges and conceal gaps resulting from any irregularities in perimeter dimensions. Use a flooring filler to fill in any wide seems along joints that blends with the tone of the wood. Afterwards, clean the floor with a recommended hardwood flooring cleaner.
Glue-Down Engineered Flooring
In order to begin installation of a glue-down engineered flooring, the first step is to evaluate the substrate to determine whether it is within acceptable moisture content with regard to the adhesive and wood supplier or installer’s recommendation. Try when possible to install the flooring at right angles to the floor joists. Finally, make sure you are using an adhesive approved by your flooring installer, manufacturer, or supplier.
To begin, using an external wall as a reference, snap a working line parallel to the reference wall, the width of the board, plus the tongue and the recommended expansion space. Use an appropriate trowel, measuring approximately 3/16’’x1/4’’/1/2’’ v notch, and apply the adhesive with the trowel at a 45° angle for the first row of planks. Put down a row of planks that runs along the length of the working line, ensuring that the first row is firmly seated in adhesive. This is important as the subsequent rows will be pushed back into this first row. Always lay the planks with the tongue facing out, as tapping the grooved side of the plank with the tapping block can potentially damage the board. Make sure to stagger your boards such that no two end joints are within three rows or 6’’ of each other.When placing boards, interlock the end joint first, as close to the side tongue-and-groove as possible, and set the board in place so as to avoid dragging the board through the adhesive below. Blue tape should be used to hold the boards together. Be sure to remove the tape within 24 hours and to use mineral spirits or adhesive remover to remove the remaining adhesive. Failure to do so will result in dried adhesive damaging the finish on the flooring. Once the floor is installed, cover with a breathable material for protection from light and foot traffic. Use appropriate trim moldings and wall moldings along walls and doorways to cover edges and conceal gaps resulting from any irregularities in perimeter dimensions. Use a flooring filler to fill in any wide seems along joints that blends with the tone of the wood. Afterwards, clean the floor with a recommended hardwood flooring cleaner.
Installation with Radiant Heat
If you are doing installation of hardwood flooring over radiant heat systems, we refer to the NWFA, National Wood Flooring Association.
![]() Radiant Heat Flooring
Radiant Heat Flooring
For engineered flooring, please refer to the specifications and warranty per each type of flooring line.